First Glue-on Ride - Cooley Ranch
13/14 June 2009
Click small photos to view larger ones
Roo and I did our first booted ride at Cache Creek last month and although we had some problems, I was able to figure out many of the kinks and am now pretty close to having a good set-up for strap-on boots for 50s.
That said, I'm trying to do Tevis this year and already
being a slow-poke know that I'll have no time to fiddle with boots, so decided to try Glue-ons at the two-day Cooley Ranch ride. Having done the Day 1 route in 2004, I knew there was tons of climbing and it would be an excellent audition for Tevis to see how the boots would fare under extreme conditions.Materials
This being our first attempt at gluing and wanting to give ourselves enough time to re-glue if necessary, Patrick and I applied the boots on Sunday evening (the ride was the following weekend). We used Goober Glue to stick them on with - I liked the idea that it sets up rubbery, and I liked the price. What I liked less was how long it took for the glue to set up and the anxious 1.5 hours while you're waiting for the glue to set, hoping the horse won't do anything stupid to unseat the boots :)
As far as cost, I bought four shells, plus a tube of glue, plus shipping, for $114 from Chris Martin, plus blew $1.50 on a caulking gun - oh,
and another $3.50 on a box of latex gloves. In
a fit of OCD, I actually dremelled a bit more breakover into Roo's front
shells. Now that I've finally figured out how to get him into a very
snug pair of 00.5 back boots, he rewarded me by starting to forge - seems
like I speeded up his backs a little too much, so wanted to
try and speed up the fronts a bit to compensate.
His other problem is he's a little toed-in, so I wasn't sure if the built-in breakover was quite where he needed it.
Sunday - The Glueing Process
Patrick was in charge of applying the glue, while
I was on hoof-prep, boot application,
and post-booting horse supervision:
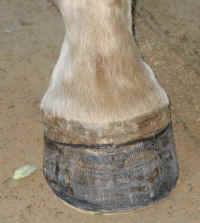 |
Pretty prep-work. I rasped Roo's
feet diligently beforehand, so he'd have a lovely trim job. Then I put
the boot on and drew around the top with a felt-tip to show which
area I had to rough up. Then I roughed with the rasp.
At that point, I discovered he had too much flare to rough the hoof, so I gave him an even more diligent trim. |
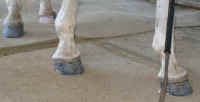 |
Pretty prep on all four feet...
After prepping his feet, I squirted a little Coppertox into his frogs to be safe. When I took the boots off, there was no thrushy smell - the boots just smelled a little like well-used athletic socks <pooh!>, |
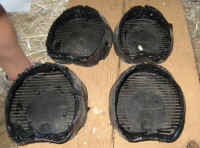 |
First we smeared the Goober Glue on all four boots. We didn't know how much to put on, so went for "a really thick layer". |
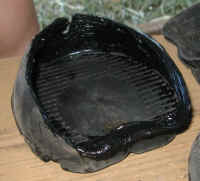 |
We paid special attention to the heels, glopping in as much stuff as we could so it would seal any gap in the back. |
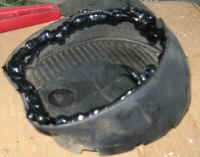 |
This one's a little blurry, but
this is the bead we put all around the boot, then added more in the
toe area.
The Goober Glue is really sticky, so hard to smear. When you try, all that happens is it sticks to your finger and you smear it all over the outside of the boot and yourself by mistake. |
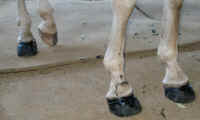 Three boots on. Three boots on.
Lots of goop on Roo's leg from him stepping out of the right front boot. As it turns out, even though he's been wearing 0.5 Gloves in front, that right front foot is his "small foot" and he should have been in an 0 all along. When we rode Cache Creek last month, the only real front boot failure was towards the end of the ride when he tripped and flipped that boot around to the front. Now I know why. More about this small foot later. Another problem was notice how he's got his rear foot cocked. He did this a lot and each time he did it, the rear boot heel would slip off the the foot. And whenever I pushed on his butt to get him to stand square, he'd twist in a front boot. As a result of all that, I wasn't convinced the right rear boot was very well attached. When he walked on it while it was setting up, it made air-slurping noises... But I was glad that we glued on Sunday so that I would a) be able to do a short but steep pre-ride on Tuesday evening to see if they stayed on and b) if they didn't stay on, I still had a few more days to glue them back on again... and back on again... and back on again... |
|
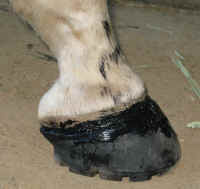 |
Right front - this is the boot he
stepped completely out of. There was space you could prod in the front
of the boot, and lots of glue stuffed in the back of this
one, since there was more lip sticking
out the back - and therefore more for his back foot to grab hold of
and pull off. Hmmm. I really wasn't very happy with the fit.
At the time of gluing, I said that If this boot came off during the week, I would try the next size smaller. Predictably, later in the week I forgot all about this ... long, tough week at work, a bear of little brain. |
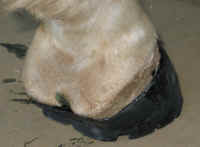 |
Rear boot. I had to twist it back
to center after about 30 minutes, mayhap this was something to avoid
in the future... as I found out on Tuesday.
After he stepped out of the front boot so easily and then the right rear seemed really slippery, we let the left rear cure longer before putting it on. At the time, it seemed relatively solid and I was more concerned about the right one (this is his "push off" foot and therefore the boot that usually twists off on the trail). Mayhap letting it cure too long was also a mistake . |
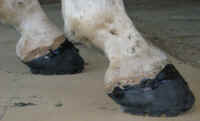 |
Goopy front boots from the side. They weren't perfectly centered... but then again, neither are Roo's feet. |
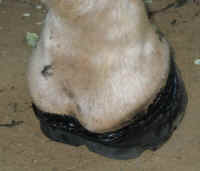 |
I tried to smear the top glue around to make a bead. It is very sticky. Lots of glue on me. Lots of glue on Roop. <sigh> |
So the whole process didn't go quite as smoothly as one might hope, but after 30 minutes of being tied tightly in front of food so he couldn't wriggle (don't let it fool you, he's still quite capable of wriggling), followed by another hour of "quiet time" in his stall (eating more food), Roo appeared to have four boots relatively firmly attached.
Monday
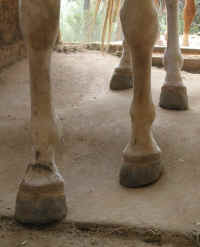
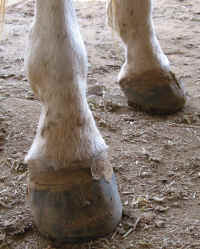
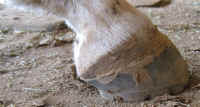
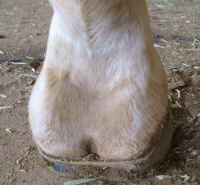
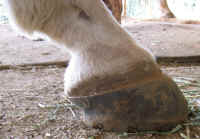
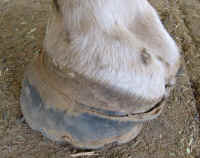
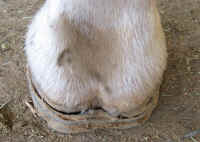
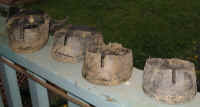
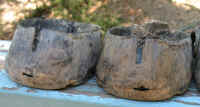
Took a bunch of photos of the "dry" Glue ons:
Tuesday
I work from home on Tuesday, so can often sneak out a little early and ride. Chased Roo around the paddock for five minutes (his idea of "sport") before him finally giving up and standing for me to halter him. Stuffed him in the trailer, drove ten minutes to the trailhead, tacked him up and, while I was standing there musing on which spare Gloves to take with me "just in case", I noticed that he wasn't even wearing a boot on his left rear. Completely gone. Checked in the trailer, but no - apparently it never made it out of the paddock. Not promising.
Rode our quick six mile loop - up the Dead Truck Hill that given the chance, cheerfully eats boots - but the other three stayed on beautifully and never showed any signs of coming off. So despite the ominous start, I felt pretty optimistic.
Wednesday
Came home from work at 8:30 pm and rushed out to re-glue the left rear boot back on by flash light. By this time we were old hands, so made short work of this activity. I had to re-rasp all the leftover glue off his foot (not something I'd want to do too often for fear of thinning the hoofwall too much) and this time even wiped his hoof with alcohol.
And of course, I figured - what the heck - if we're re-glueing anyway, we might as well redo that right front that was slightly twisted and not as firmly attached as I wanted.
Deciding to pull it off isn't the same as actually pulling it off and it was quite a struggle to get it off completely. I concluded that a) it probably would have stayed on if I'd left it alone and b) Goober Glue has a great bond to it.
Got the right front boot back on and packed tons of extra glue into the toe in an effort to get a more snug fit. Despite my earlier comments, apparently I had no thought of using the smaller shell <sigh> (as previously mentioned, I was having a tough work week).
After the 30 minute period was up and Roo could be untied, I went indoors to grab something to eat and came out again after an hour to let him out of the stall. The left rear boot looked fine - nice and snug. The right front boot was lying in the middle of the stall nowhere near his foot. Cursed quietly. Let three-booted Roo out and went to bed.
Repeat after me "Roo's right front is his small foot". Why was I trying to re-glue the same too-big boot on??
Thursday
Came home from work at 8 pm and rushed out to re-glue the right front boot - only this time, using an 0 size boot. He'd been wearing 0s in the back until I got brave enough to remove sufficient toe to smoosh him into a pair of 00.5s, so I had a pair of 0 Gloves with only about 40 miles on them. Took the gaiter off and voila - a shell ready for gluing.
The fun part about using shells with gaiter holes in them is the glue comes out the holes like worms. Easily amused, me. The boot went on beautifully and never moved and I was very pleased with how snug the fit was.
About 40 minutes into the hour-long "quiet time", we heard horse-shrieking coming from outside and ran out to discover that four of the other horses had let themselves out and were running about the place, abandoning Roo in the barn. He was shrieking and leaping up and down and pawing - of course with his newly glued, but- not- yet- completely-cured, right front foot. Argh.
Patrick spent 20 minutes rounding up giggling horses, while I hung onto Roo (religiously shrieking in my ear every two and half minutes) and insisted that he stayed still, didn't paw, didn't leap about, didn't twist, etc.
Friday
Drove to the ride. Arrived with four boots. Good start. Took him for a couple of miles ride. Boot still there.
But the boots worked beautifully. Excellent!
Sunday
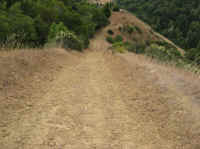
We naively thought that Day 2 would be the easier day. Not.
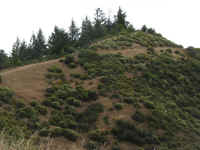
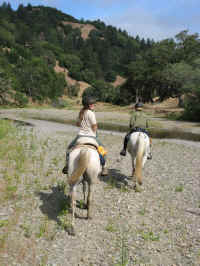
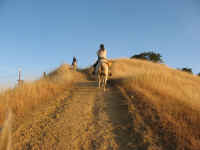
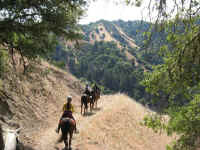
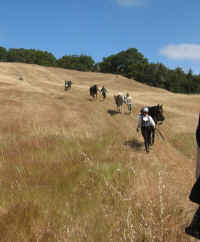 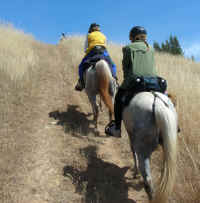 Day 2 consisted of even more vertical climbs, riding
for several miles in the river bed, crossing and crossing again through
the river, followed by more vertical climbs, followed by more vertical
descents, followed by more vertical climbs - repeat. Day 2 consisted of even more vertical climbs, riding
for several miles in the river bed, crossing and crossing again through
the river, followed by more vertical climbs, followed by more vertical
descents, followed by more vertical climbs - repeat.
9,600+ feet of climbing... |
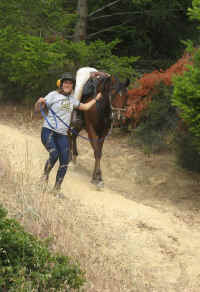
Walking the last part to the top of
the hill after the Glue-on failure, (*The "tired, well-used Gloves" had actually not done very many miles, but suffered badly on our excursion on CA Loop, preriding some Tevis trail. I was ecstatic that they stayed on so well - finally a boot that Roo couldn't twist off on uphills, but unfortunately now I had to remedy a toe-dragging problem.) And I'm pleased to report that the Glove stayed on very nicely, despite still having a few steep climbs to do. There was a downside of having to carry a bunch of spare boots "just in case" (OK, so again, OCD - I had two front Gloves, two back Gloves and a pair of back Renegades, "just in case"), but this being the first attempt, I wasn't sure what to expect. At the lunch vet check, I'm sorry to say I was remiss in checking under the gaiter for crud, and equally remiss about remembering to put on a pastern wrap (little strip of neoprene velcroed around his leg). He seems less prone to rubbing in the back and didn't rub at all on the spare back Glove he wore at Cache Creek, so I think that's why I got complacent. Having finished Loop 2 in the Glove, it was another ten miles or so into the next loop before I happened to glance down and notice that, uh, if I didn't replace that back Glove soon, he was going to come through the front of the boot. Oops. At the next trough, I switched it out with the other, equally worn, spare Glove and we finished the ride like that. And not wanting him to be lopsided, I actually left the Glove on until Monday morning when I finally prised the left rear Glue-on off - and realised he had a rub on his pastern from the gaiter. Sorry Roop. Next time I'll do better. The two-days at Cooley Ranch turned out to be one of the hardest rides I've ever done, so in terms of a Tevis try-out, it was excellent. I couldn't have asked for more extreme climbs to see how well the Glue-ons would work. Post-Ride Inspection After Removal Using a large flat-head screwdriver taking the boots off wasn't hard - although they were still very tightly attached. I removed them while Roo was wandering around loose, grazing, and only once did I inadvertently prise too hard on the side of the hoof wall. To avoid this, you have to jam the screwdriver down the side all the way to the bottom and then prise, so you're not levering on the hoof. Back Boot Musings Although I think I can get the back boots to work for Roo, I've run out of time to get them perfected for Tevis in seven weeks (even a long training ride doesn't mimic the abuse these boots will get, so unless I could try them on a 50, I wouldn't be confident enough to rely on them) . Until I've had a chance to try out the reinforced toe shells (not available until July), I won't know if they will be sturdy enough for him over such extreme terrain/100 miles. So yesterday, I booked my shoer for back shoes two and half weeks before the Ride. Roo will be wearing boots on the front. He hasn't worn shoes since Christmas, as we've been doing all our riding booted since then. After Tevis, they will come off and I'm hoping he won't need to go back into shoes again. On any future rides, I'll have time to fiddle if we have any minor boot failures - Tevis is the exception. I'm kind of bummed about it, because I think the concussion protection of the boots is really good. At Cooley Ranch, when we weren't climbing-climbing-climbing or trudging through creek beds, we were making up time by travelling at a good clip on hard dirt road. Roo's legs looked great afterwards - although he's not prone to a lot of filling, he had none at all, despite only using ice boots at the end of Day 1 and applying Sore-No-More. I didn't wrap his legs at all.
|
